|
|
Puddle Jumper
Posts: 6
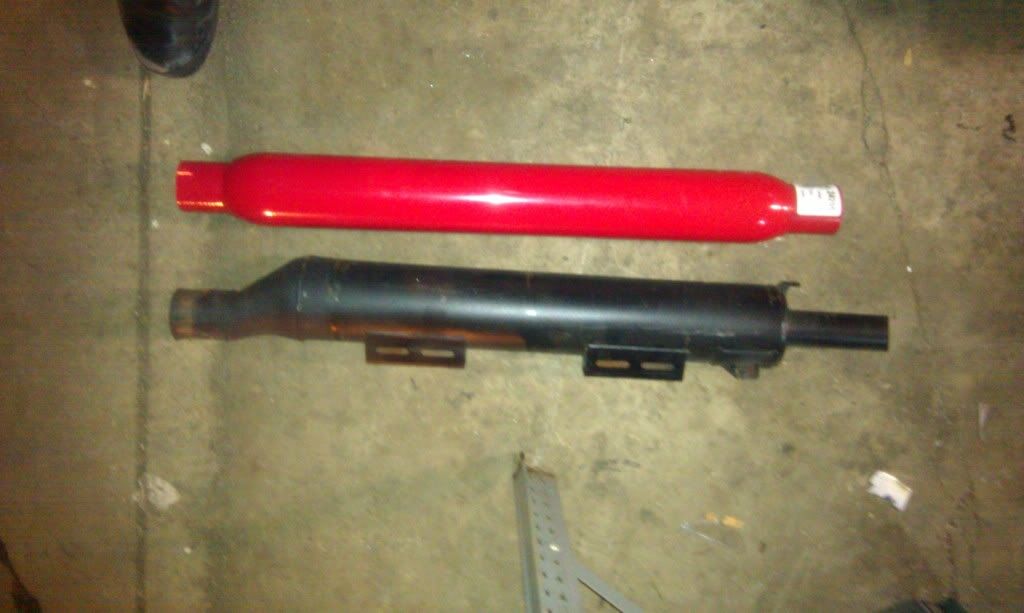
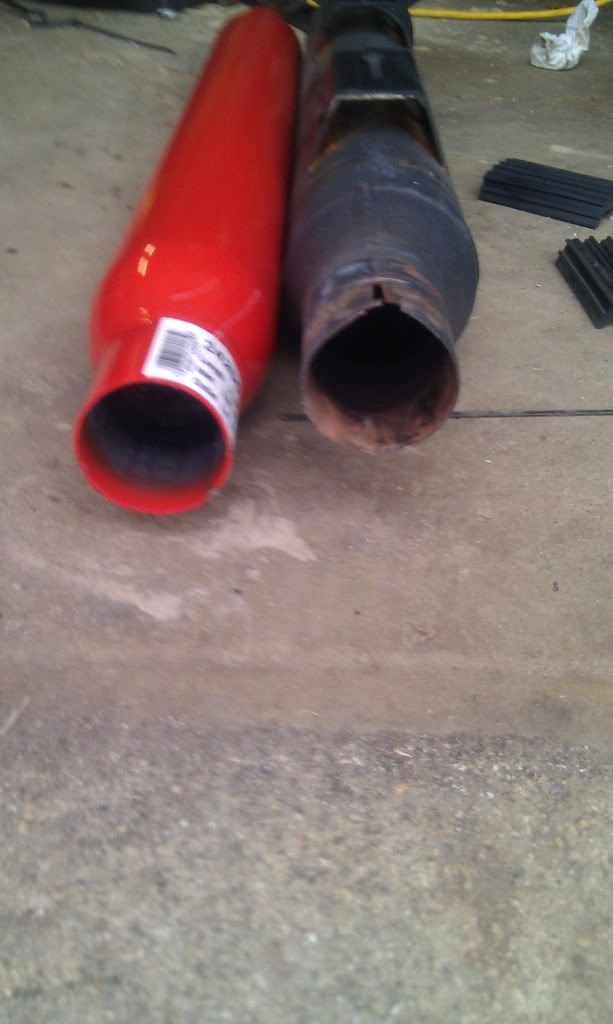
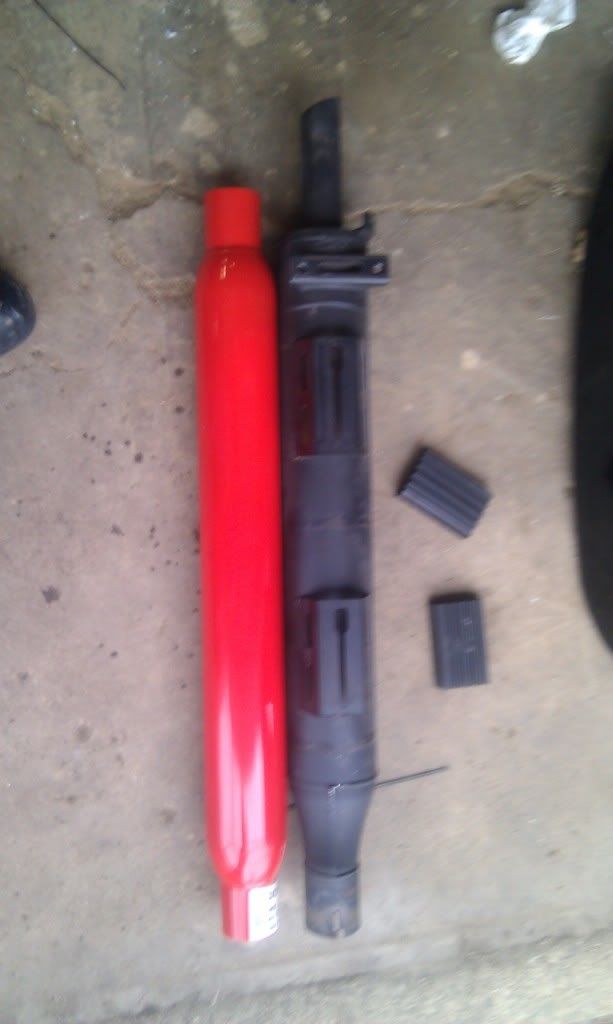
| I bought my Cross Roads with a Stage 1 set up and like it enough. I don't love it but I like it. Following the thread on the Vision forum, I decided to take a plunge and attempt to do the thrush mod on my XR. The issue I'm running into is the glass pack is too close for my liking to the saddle bags. On the stock exhaust and the stage 1 exhaust the exhaust drops approximately 1.5 inches from the head pipe then back. The stock pipe has an odd hickey to it. A buddy of mine and I have a couple of idea on resolving this but I'd like to keep this in the spirit of the original mod. Cheap, easy, and off the shelf if possible.
I've attached my pics. I'll post them once I figure out how to do that on this forum.


 |
|
| |
|
Fountain Inn, SC United States | Phil, interesting dilemma. Let us know how you work out the kinks.
Could you possibly get a shorter Thrush muffler and add a short "jog" at the front end with some pipe sections from AutoZone or the like? |
|
| |
|
Puddle Jumper
Posts: 6
| After doing a little math and experimentation I found a solution. The magic angle is 16*! After experimenting with differing lengths of pipe I found the proper drop and fit required to get a 2.25 glass pack to fit on my cross roads. This thing sounds like a cammed out 396 Chevelle without the loudness! I'll post up a tutrorial when I'm completely finished. I know I'm a little slow but between work and home life, playtime gets thin. I'm still trying to make this as off the shelf as possible but the stock muffler design makes it a bit difficult. It's nothing a decent exhaust shop couldn't handle though. So far I'm into a 2.25 inch exhaust for just under $70. By the time I'm finished a complete parts list will cost less than $75. Labor from a shop will add a few bucks but if you're handy and have the tools (welder, grinder, chop saw) it might be even cheaper!
I don't believe it makes a difference whether I have soft or hard bags. I doubt mother Vic is going to make a separate exhaust based on bag configuration, Currently I'm keeping the exhaust about 1/4 to 1/2 inch lower than stock. Getting a decent gap between the bag and exhaust was my utmost concern! I'm currently working out the height of the bag standoff with a non-flamable yet soft material to cushion the bag.
The shorter 2.25 inch glass pack will work out much better in this mod. The 31 inch overall length of the muffler I used was a bit too much but It can be modified to work without issue!
My solution pipe!
http://i201.photobucket.com/albums/aa167/PhilC64/IMAG0060.jpg
Edited by PhilC64 2011-03-12 8:20 PM
|
|
| |
|
Puddle Jumper
Posts: 6
| I finished off the glass pack install and would like to give an overview of what's involved. Unlike the Vision bikes, installing the glass packs on the XR or XC is a lot more complicated. On the 5 banana scale of garage work this was a 3.5 Mind you, I have steel on hand, a grinder, band saw and welder available. If you don't have these available then a decent exhaust shop would be able to fabricate it for you if you wish to go this route.
The original exhaust is over 4 inches in diameter while the glass pack is right at 3.5 inches. It's a world of difference and one of the reasons why a bit of fabricating is involved. As previously mentioned I had to make an offset exhaust pipe that would follow the design of the original exhaust.The straight glass pack would not fit without it. Once I fabbed the dogleg and used the existing exhaust clamp, the other issue I ran into was creating a bracket to attach the exhaust to the rear hanger. I managed to use part of a 3.5 inch exhaust clamp and welded a 1.5 inch 90* angle bracket to it. I drilled the appropriate sized holes then bolted it to the bracket. The last issue I had was fabricating the standoffs for the hard bags. I found that the distance between the glasspack and the hard bag was 2.25 inches. This distance allowed the bag to sit as designed and give the proper gap between them and the rear fender. I used a piece if 2 inch square tube with one side cut to fit on the round glass pack. ( Think of it as making a square into the letter "C" I then padded it with a .25 inch piece of dense closed cell foam. I attached the chrome with 4 inch clamps since the originals were too big to use. The original exhaust tips can be used but would require more fabricating. I'm not a big fan of the original exhaust tip so I'll be using a pair of chrome resonator tips instead. The Vision folks have used these with success so I believe going this route would be good.
I tested the exhaust several times during the install but gave it a full on run after I completely installed the exhaust. The fabricating and head scratching was well worth the effort! It's a lot deeper and a bit louder than the stage 1 I have. The test ride was another eye opener. I have the rubber intake strip removed, the O2 sensors removed and plugged and now a 2.25 inch baffled exhaust. Starting it initially took a bit since the stock ECU needed to relearn a few settings. Once started and the idle settled I took it for a 10 mile run. The bike ran like dream. Low end power was increased, top end power increased, and the throttle response was incredible. There was no popping at all under any condition. I will however be getting a VFC or power commander to take full advantage of the mods.
My overall opinion is that it would be easier to take advantage of the original stock exhaust and recore it with a 2.25 inch baffle than to go the glasspack route. Pipes like that are already available and are a direct swap. The cost of those would be worth it just in the time saved in doing the mod. I personally would do the recore myself on a stock exhaust and have the baffle removable so I can change it when needed.
|
|
| |
|
Cruiser
Posts: 65
Halifax, NS | Very cool well done
What I dont understand is the removal of the O2 sensors. That should log errors into the ECU
The purpose of the O2 sensor is to tell the ECU if the bike is running lean or rich. And then the ECU should add or reduce fuel.
If by disconecting the O2 sensors the ECU runs richer and makes more power I can understand the un-hook.
But by just changing the pipes the O2 sensor should tell the ECU things are lean and ad some fuel.
I can see if enough mods were made that the ECU cant make up the difference - then a fuel proccesor will be needed.
Other wise why put the O2 sensors on the bike.
Rob
|
|
| |
|
New user
Posts: 3
| Hi Puuddle Jumper, any otyher news to this modification?
I am looking at ordering some 27inch overall length Cherry Bomb mufflers from teh USA to send Downunder and wanted to see how it has all progressed before I use up AUS$140
Cheers
Chris |
|
| |
|
New user
Posts: 4
| Any updates on how the project worked out after a summer? Am looking for a change from stock, have resources to easily make this happen. I like the idea of cheap,and keeping the stock mufflers around just in case. |
|
| |
|
|
Look up youtube video under noemtz. For those that don't feel comfortable doing this mod...I can do it for you. I use Magna-Flow or Thunder Monster baffle components. Also have the service listed on my site under intake and exhaust. Happy to help. http://www.youtube.com/user/BIGMAGNAMAN?feature=mhee
Edited by NOEMTZ 2012-12-27 11:37 AM
|
|
| |
|
New user
Posts: 2
Gladstone, MO United States | Not to hijack the thread, but I shot some video while doing the Thrush mod on my 2013 XCT. The dealer gutted my exhaust as part of an "upgrade" upon purchase. It did sound OK, but was way too loud for my liking on the highway. I decided to do a variation of the mod you talked about. I just thought I'd post it here. If it wasn't for your post and others that posted information, I may not have had the nerve to go through with this. I love the sound now. It's just the right amount of bark when rolling on the throttle but not obnoxious while going down the highway. I still have a slight touch of backfire but I'm ordering a PCV with autotune to take care of the rest.
I thought I'd post my experience for anyone else thinking about this mod.
http://www.youtube.com/watch?v=fAGQaGYkSyA
|
|
| |
|
Puddle Jumper
Posts: 27
Leduc Alberta Canada | Victoroy - 2013-05-13 5:00 PM
Not to hijack the thread, but I shot some video while doing the Thrush mod on my 2013 XCT. The dealer gutted my exhaust as part of an "upgrade" upon purchase. It did sound OK, but was way too loud for my liking on the highway. I decided to do a variation of the mod you talked about. I just thought I'd post it here. If it wasn't for your post and others that posted information, I may not have had the nerve to go through with this. I love the sound now. It's just the right amount of bark when rolling on the throttle but not obnoxious while going down the highway. I still have a slight touch of backfire but I'm ordering a PCV with autotune to take care of the rest.
I thought I'd post my experience for anyone else thinking about this mod.
http://www.youtube.com/watch?v=fAGQaGYkSyA
Roy
Great video.
I did the same as you between Christmas and New Years.
I used 2 1/4 inch Cherry Bombs with no tailpipe as I have the Vision Gatling tips.
I also welded a flange with a 2 1/4 inch hole at the front of the muffler to make sure no exhaust
was getting trapped between the 2 pipes, as I also only made the hole at the back big enough for the pipe to stick through.
I am running stage 1 flash, Lloyds air filter and O2 sensors unplugged.
I only get lots popping when its cold.
Other than that only a small burb sometimes on decal.
Also had that small burb with stage 1.
I love the sound that this produces and if I find it to be too loud at any point I can weld a tailpipe on and install the original tips which will lower the db's as well.
Once again you did a great job with the video.
I wish I had watched something like it before I did mine as it would have saved me a lot of pissing around. |
|
| |
 Attempt at a Thrush glass pack mod.
 Attempt at a Thrush glass pack mod.