|
|
Cruiser
Posts: 231
Desert Hot Springs (Palm Springs area), CA | My 2009 Ness had the left side lit badge burn out. I knew from reading here (and elsewhere) that the badge is lit by an LED panel that was created by Lumex just for Polaris to put on the Vision. Normally these LED panels should last a long, long time. I popped off the glued-on chrome bezel (via the weep hole on the bottom) which, BTW, came off fairly easy. This revealed the LED panel. 
The panel is glued in by what looks like silicone glue drops around the inside. I carefully detatched these points and removed the panel. Next I excavated some of the plastic inside the shell so that I could then put some strip LEDs inside. 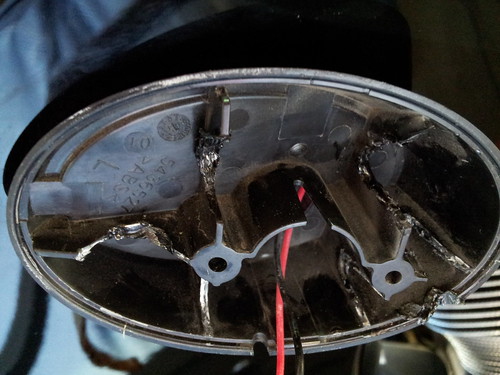
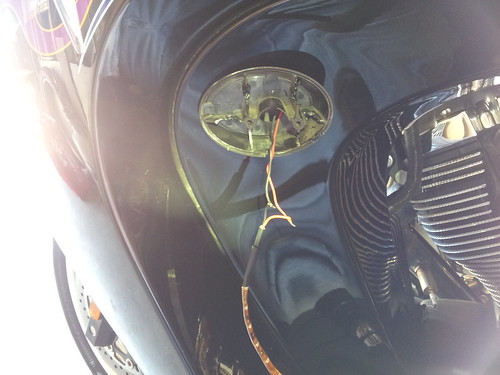
Here are the LED strips attached to the inside of the shell 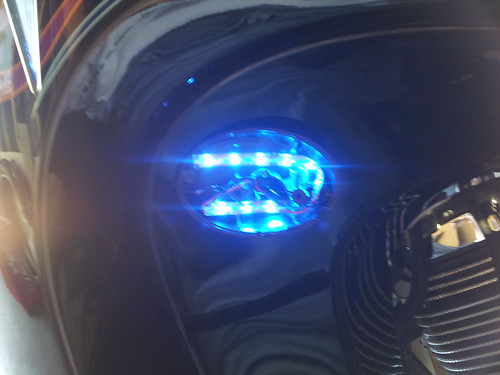
As you can see I installed some blue LEDs! Here is the finished look. I reglued the badge on via epoxy. 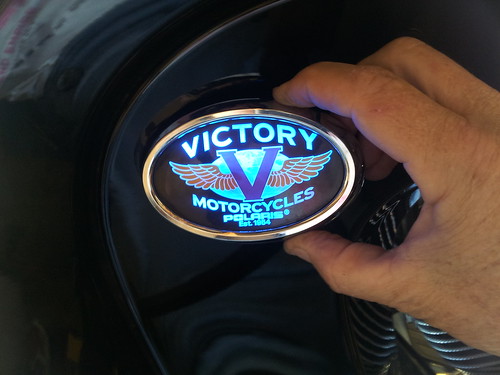 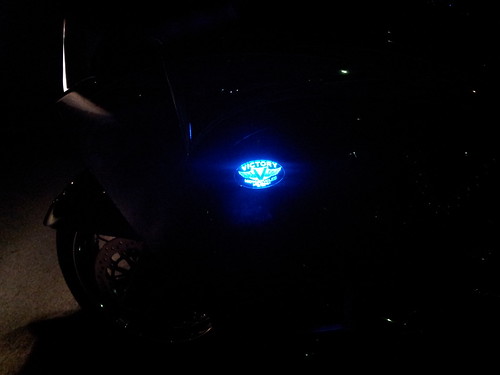
One final observation. I believe the orignal panel failed due to water entering in between the logo and panel and shorting it out. I think this is the case as there was evidence of wetness on the inside of the logo. I'm going to seal off my other light where the chrome bezel meets the logo. My blue LED's show the logo really nice in the day!
Edited by JS5Owner 2014-03-21 12:18 PM
|
|
| |
|
Iron Butt
Posts: 804
Perry Hall, MD | Nice job. Thanks for the idea and pics. |
|
| |
|
Cruiser
Posts: 92
Moncks Corner, SC United States | How much brighter is the new and improved side compared to the regular side? |
|
| |
|
Cruiser
Posts: 231
Desert Hot Springs (Palm Springs area), CA | Jimbo62 - 2014-03-21 8:47 PM How much brighter is the new and improved side compared to the regular side? Because it is blue, it is hard to say. In my eyes it stands out more artistically... hense brighter. |
|
| |
|
Visionary
Posts: 3773
Pittsburgh, PA | i did that same thing in 2009 when my 2008 visions left badge burned out! its alot cheaper than buying a new set !! |
|
| |
|
Iron Butt
Posts: 752
Broken Arrow, OK | Pulled over a few months ago and the right side badge was dangling by wires on my 2011. Glued it back on.
I can see a mod like this in my future. Thanks for posting, good job |
|
| |
|
Visionary
Posts: 1229
Rancho Cucamonga, CA | What a great idea.! I had one replaced under extended warranty, but when that runs out, I would definitely do that before buying a new one. |
|
| |
|
Visionary
Posts: 3773
Pittsburgh, PA | before you glue it back together.. TEST IT. when i did mine years ago, i did it once and didnt like it and had to add MORE lights so try and get it to match the other side. also keep in mind "color" of the led you use.. |
|
| |
|
Cruiser
Posts: 281
| Thanks for posting this! |
|
| |
|
Visionary
Posts: 3006
San Antonio, TX | You should put this write up in the Tech section.
Nice work |
|
| |
|
Iron Butt
Posts: 763
Anderson, IN (48mi NE of downtown Indianapolis) | Good info. Thanks for posting. |
|
| |
|
Cruiser
Posts: 231
Desert Hot Springs (Palm Springs area), CA | I'm glad folks like the concept... I think if Ma Vic would have sealed the logo/lens to bezel we would see fewer failures. Water on electronics doesn't help them. |
|
| |
|
Cruiser
Posts: 241
Monrovia, Ca | Had my left side replaced last month under warranty. Now I know what to do next time |
|
| |
|
Visionary
Posts: 1350
| Thanks. Nice write and pics. |
|
| |
|
Cruiser
Posts: 70
Central Victoria, Australia | What type of LEDs did you use?
Nice and simple, I like the blue. Has anyone else tried another colour!:-) |
|
| |
|
Cruiser
Posts: 231
Desert Hot Springs (Palm Springs area), CA | Ploz58 - 2014-04-25 2:23 AM What type of LEDs did you use? Nice and simple, I like the blue. Has anyone else tried another colour!:-) I don't remember the brand. I actually think I got them from China via eBay. They were about 16" long but had the ability to cut the strip after 3 or 4 LEDs. That is what I did. |
|
| |
|
Visionary
Posts: 3773
Pittsburgh, PA | the repair works but does NOT look anything like the other side. be ready for that, if this is something that is Important to youself.... i did this 5 years ago and it worked. ... but if you were to circle around the bike, one might say.... hey whats wrong with this light.... as you wil be able to pick out the leds behind the badge.. i "fixed" mine years ago, i would NOT do it again.. the amount of time spent on it wasnt worth the outcome. yes it was cheaper than $150, but it also didnt look OEM any longer either. |
|
| |
|
Cruiser
Posts: 112
Denver, Iowa | my badge

(bike logo 121.jpg)
Attachments
----------------
 bike logo 121.jpg (31KB - 3 downloads) bike logo 121.jpg (31KB - 3 downloads)
|
|
| |
|
Puddle Jumper
Posts: 21
| Awesome job and info. Thanks. I have already replaced one side and will more than likely resort to your method next time this happens. |
|
| |
|
Cruiser
Posts: 83
Springfield Mo. | Lost the chrome bezel off of mine and had to buy a whole new light to fix it. They ain't cheap. Guess I now have an extra lighted badge now if one ever goes out. |
|
| |
|
Cruiser
Posts: 167
, OH | I just did this. Wish I would have found this first but I did the same thing. Only difference is I used WHITE LED's for a little brighter. I have them side by side. Factory and led with photos for the difference. It's so close that being on opposite sides of the bike you would never know.
Because the led strips, as pictured above, illuminate facing outward, and not on the leading edge. The led strip when placed inside the housing lays on the "EDGE" so the led's shine left and right not OUTWARD. if the LEDS were shining on the edge and not shining the face, and the led's faced outward they would be super bright. (aka if it were a book, shine on the spline outward not the flat cover side).
I will post pics. |
|
| |
|
Puddle Jumper
Posts: 27
| Thanks man. left side now. |
|
| |
 Lighted Badge burnout repair.
 Lighted Badge burnout repair.