|
|
Iron Butt
Posts: 763
Anderson, IN (48mi NE of downtown Indianapolis) | I want to turn on the lighted badges without having the key in the ignition. That way when I go into an eatery/drinkery I can leave the Victory logos illuminated. Hopefully this will reduce the number of people standing around my Vision waiting for "the owner" so they can ask, "Who makes that bike?". One guy actually waited 30 minutes just to find out. Besides, I think it will look sharp at night parked in front of my favorite establishments.
I plan to put a rocker switch in the extra hole in the console (next to the HID switch). The switch itself will illuminate when on. This way I won't forget to turn it off when I get home.
I will run a separate fused line from the battery to the switch (unless I find a suitable "constant power" line under the center console). Then I will run a line from the switch and tap it into the positive side of the badges. The badges are wired to the Powerlet in the glovebox and the horn (before the horn button of course).
Does anyone see any problem with this? There is a relay upstream of the badges for the horn, but I don't see it being a problem. Anyone already do this? Is my understanding of the circuit correct? I don't think this circuit (badges, horn, and Powerlet) is tied to any others, but I wanted to check to make sure. I just want to make sure I am not going to disable the cruise control or unleash some unforeseen electrical gremlin.
Thanks in advance for your comments and advice. |
|
| |
|
Tourer
Posts: 337
san antonio, tx | Just run a separate circuit for it and disconnect the original one as close as possible to the light. I've never took mine out so I don't know how it's connected. Hopefully there is just some sort of plug that is easy to disconnect. That way, you can just plug it all back in to the original configuration when you want.
By using the term downstream, are you asking if the lights are wired in series? No, they are not. You should be able to disconnect them and not affect the other things on the circuit.
I don't know about you, but when I'm in the market for a used vehicle, one of the biggest reasons I'll walk away right now is if I see any indication of someone monkeying around with the wiring, trying to make it "better" than stock.
Edited by cchristo 2011-11-13 8:57 PM
|
|
| |
|
Iron Butt
Posts: 1117
Northeast Ohio | Regardless of how you end up wiring it in, I would put it on a timer. You will hate your idea the first time you leave it on over a few days of not riding and come out to a dead battery. |
|
| |
|
Visionary
Posts: 4278
| First you should check to see how much draw the lights would have. Then you could splice into the wires under the dash so the lights could be used by a switch or when your running down the road. Even look into a way that if voltage drops so much it would shut the lights off when sitting still that way you could start the bike and get home. Make your self some long jumper cables so when the lights drain your old battery you can get started and make your way home.
I tuck the badges off the bike cause to me it looks like a after thought for beautiful designed bike. When you tell most its a victory they have a blank look on there face any how. Then you tell them its made in Iowa and you can hear it coming "O" |
|
| |
|
Iron Butt
Posts: 785
Mt. Vernon, WASH. | I believe they are LEDs so should draw micro amps |
|
| |
|
Visionary
Posts: 2027
Brighton, TN | Turn the key to accessory and pull the key, works like a charm. You can show it off and no one can steal it. I left it this way for around three hours one time at a bike night. The speedometer panel is lit on the dash and the radio stays lit. You can also play the radio without the key in it. One of the best features I have found.
Still started when I got ready to leave. If it does die, get someone to give a push and drop the clutch in second gear and it'll roar to life. Speaking only from experience.
Edited by pollolittle 2011-11-14 4:08 PM
|
|
| |
|
Iron Butt
Posts: 763
Anderson, IN (48mi NE of downtown Indianapolis) | When I stated "There is a relay upstream of the badges for the horn," I mean the horn relay is in series with the badges. I would be slicing in after the relay.
I have not taken the badges apart, but I hear from multiple sources they are LEDs. If so, running the battery dead could be a non-issue for me. I physically see my bike every day so I would notice the badges and rocker switch lit up. Only if I go away for the weekend and left it on would it be an issue. Even then I don't think the LED's would draw enough to discharge the battery over two days. I will definately test this after the modification to see how long I can leave it on before the battery drops below 10 volts. An automatic shutoff at a specific voltage is a good idea.
I am using the accessory setting on the ignition switch now to light up the badges and gauges. This does work good as mentioned above. However, the red oil light comes on too. That causes unnessesary questions from the crowds. That is the only reason I want a separate switch for the badges. I also get, "Hey man, you left your lights on" whereas the badges alone would be more obvious that they were purposely left on.
Thanks for your comments and I welcome more ideas. |
|
| |
|
Central Wisconsin | victoryvisiontour - 2011-11-13 4:27 PM I want to turn on the lighted badges without having the key in the ignition. That way when I go into an eatery/drinkery I can leave the Victory logos illuminated. Hopefully this will reduce the number of people standing around my Vision waiting for "the owner" so they can ask, "Who makes that bike?". One guy actually waited 30 minutes just to find out. Besides, I think it will look sharp at night parked in front of my favorite establishments. I plan to put a rocker switch in the extra hole in the console (next to the HID switch). The switch itself will illuminate when on. This way I won't forget to turn it off when I get home. I will run a separate fused line from the battery to the switch (unless I find a suitable "constant power" line under the center console). Then I will run a line from the switch and tap it into the positive side of the badges. The badges are wired to the Powerlet in the glovebox and the horn (before the horn button of course). Does anyone see any problem with this? There is a relay upstream of the badges for the horn, but I don't see it being a problem. Anyone already do this? Is my understanding of the circuit correct? I don't think this circuit (badges, horn, and Powerlet) is tied to any others, but I wanted to check to make sure. I just want to make sure I am not going to disable the cruise control or unleash some unforeseen electrical gremlin. Thanks in advance for your comments and advice. Just an idea...there's a Blue with a Pink tracer (BU/PK) wire that runs hot from the 20amp windshield fuse to the rear powerlet, trunk lights and cd power plug. Maybe you could find that wire some where midstream, tap into it, run it to the lighted rocker switch you want and back to the GY/PK wire(s) for the badges and protect it with a small amp fuse. OR Use the BU/PK wire as a trigger wire and run it to a new relay, wire in the lighted rocker switch and get power from the 40amp circuit breaker terminal (or) battery with a smaller inline amp fuse.
|
|
| |
|
Iron Butt
Posts: 763
Anderson, IN (48mi NE of downtown Indianapolis) | I finally got a couple of hours free to try this mod. It turned out being extremely simple. I accomplished exactly what I wanted without modifying any part of the bike. Everything was Plug&Play. Click the link below to my Tech Reference on it.
http://www.vision-riders.com/bb/forums/thread-view.asp?tid=10377&po...
.
Edited by victoryvisiontour 2011-11-28 2:15 AM
|
|
| |
|
Central Wisconsin | victoryvisiontour - 2011-11-28 2:13 AM I finally got a couple of hours free to try this mod. It turned out being extremely simple. I accomplished exactly what I wanted without modifying any part of the bike. Everything was Plug&Play. Click the link below to my Tech Reference on it. http://www.vision-riders.com/bb/forums/thread-view.asp?tid=10377&am... . Your lighted Badge mod looks professional. Nice write up and clear photo's. Now all you need to do is wire in a remote control switch for the horn ... lol!
|
|
| |
|
Tourer
Posts: 599
New Mexico | Very nice! Very professional, and well documented. I might have to give this a try.
|
|
| |
|
Visionary
Posts: 3204
Memphis | Great write-up! |
|
| |
|
Visionary
Posts: 3006
San Antonio, TX | Great job! Thanks |
|
| |
|
Iron Butt
Posts: 763
Anderson, IN (48mi NE of downtown Indianapolis) | I started a test to see how long the lighted badges could be left on before the battery voltage dropped below 10volts.
The battery read 11.5 volts at the start of the test (I was doing some radio mods/testing before so that is why the battery was 11.5V). After 12hrs of constant ON, the volt meter still read 11.5 volts.
I will have to wait until there is snow on the ground to have enough down time to allow the LED badges to discharge the battery to any measurable amount.
Preliminary Conclusion:
If the badges were accidently left ON, there is little chance it would leave you stranded. |
|
| |
|
Visionary
Posts: 4278
| Its a shame that victory badges don't say American made sorry American built. When the new Chrysler 300 came out they said American made. The tv add lasted a half day before it was pulled. They don't need to refur to 1964 or even Polaris
Edited by john frey 2011-12-27 11:32 AM

(get-attachment.asp.jpg)
Attachments
----------------
 get-attachment.asp.jpg (33KB - 1 downloads) get-attachment.asp.jpg (33KB - 1 downloads)
|
|
| |
|
Iron Butt
Posts: 763
Anderson, IN (48mi NE of downtown Indianapolis) | John,
I agree, I would prefer the badges be plain and simple with "Victory" only on them. |
|
| |
|
Tourer
Posts: 307
Columbia, SC | I think this'll be an easy and quick install. I think I'll end up running the wires and switch into the glovebox though so I can control it going on and off and don't have to worry about others messing with it. Good writeup on the tech reference. Makes it look REALLY easy, and I appreciate the experiments here on the power draw. Makes me feel warm inside.
Alexi |
|
| |
|
Tourer
Posts: 307
Columbia, SC | Also, I think I'll run another wire and tap into my new (after christmas) lighted Victory Trunk emblem, so the trunk and the two badges light up.
Alexi |
|
| |
|
Tourer
Posts: 307
Columbia, SC | Alright. Did my install following your thread HERE, but I decided to involve the rear trunk LED. Thanks VICTORYVISIONTOUR for the inspiration and doing the hard work of finding out which wires controlled which lights.
Ok. So I decided to do the install pretty much as stated, except I ran an extra wire to the trunk to tap into the lighted victory trunk emblem, and I wanted my switch in the glovebox (non-accessible to someone walking by my bike). It took a little extra wiring, and there'll be a quick question at the end. Also, you'll see a lot of connectors (spade type). I do this so I can put it back to stock without having to solder, and also so if I wanted (I probably won't but IF) to take off the trunk, I won't have to clip wires, just undo a few connectors and put it back together when I put the trunk back on.
Here's some pics and descriptions...
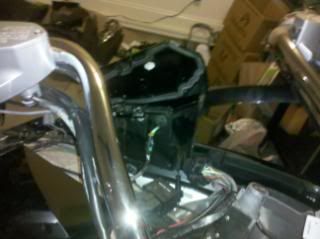
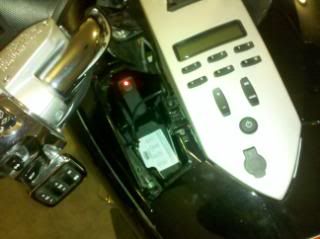
1) Here's the glovebox disconnected from bike and pulled up so I can reach it with a drill.
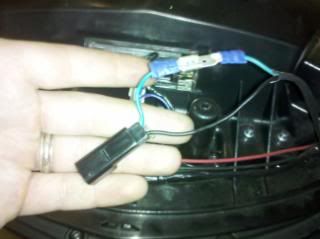
2) Here's how I disconnected the victory lighted trunk emblem. The spade connecter is connected to show you that I can put it back to stock just by plugging it back in.
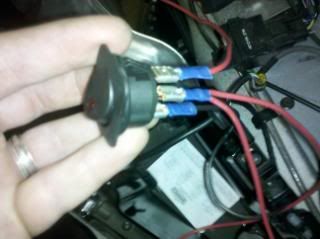
3) Here's the switch I decided to use. There are TWO wires coming out the middle. ONE is going to the gray powerlet plug as per the writeup, the SECOND is run all the way to the back (following a thick bundle of wires, through the loom up the trunk, and has a spade to connect to the victory trunk emblem).
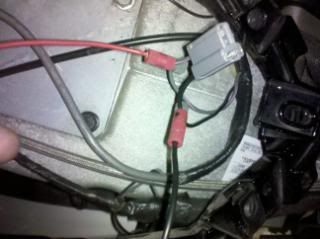
4) I decided to use positaps to connect the ground and switched power to the powerlet plug.
5) Here is the connecter by the trunk, so if I want to take the trunk off, I just have to cut the heat shrink off and disconnect it.
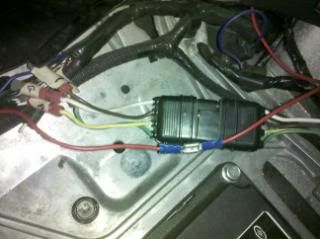
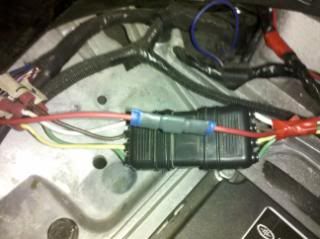
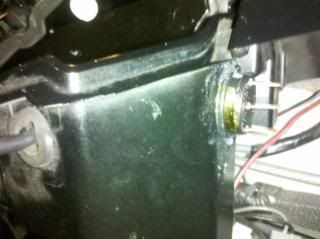
6) Here's the switch installed in the glovebox, and I used silicone and a rubber o-ring to try to protect from the elements. I SUCK at using silicone. Looks like crap every time.
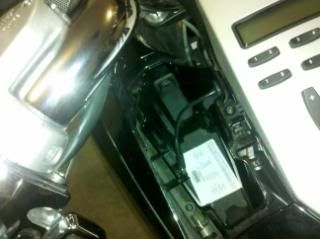
7) Bike re-assembled and switch off.
8) Switch on.
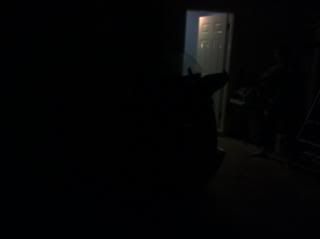
9) Lights (switch) off in dark garage.
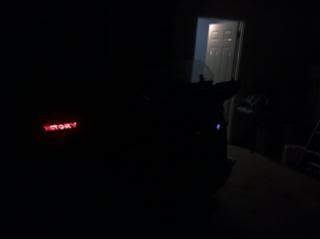
10) Lights (switch) on in dark garage.
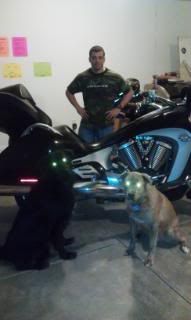
11) Me and my crew after all the hard work!
Thanks for checking it out. If I work this correctly, I can use a positap to tap into that switch and hook up any other LEDs I want on the bike. I'll just have to be careful to properly place diodes so the LEDs don't turn on with the key (since the emblem and sidebadges would send current back) and only turn on with the switch.
And now for the quick question....when I ran the wire all the way back, I just guided it and taped it to a thick bundle of cords. Think it's necessary to buy a plastic loom to protect it? I'd just have to cut it on the side and wrap it around so it wouldn't be hard at all, but you think it's a good idea?
Alexi
PS - I did NOT find any problem with the switch lighting up when the key is turned on. So I didn't install a diode. I wonder if it's a difference in the way the switch was made, or who made the switch, or something. But I didn't need a diode and the switch does NOT light up unless it is physically turned on.
Edited by sfalexi 2011-12-31 12:38 PM
|
|
| |
|
Iron Butt
Posts: 763
Anderson, IN (48mi NE of downtown Indianapolis) | Alexi,
I like the trunk emblem in conjunction with the badges. That will be a real eye catcher. Be prepared to have people standing around it when you come out of a restaurant ready to assault you with questions.
Your switch is probably a double pole double throw which would keep its LED from illuminating when the key is turned on. Or, it's possible it has a built-in diode. I went cheap with a switch I found in the automotive section of the grocery store.
Good job and looks great. |
|
| |
|
Visionary
Posts: 4278
| From the photos I see you have the dogs eyes lighting up too.
I like the switch in the glove box cause I'm sure some one would try to help by shutting the lights off that you left on |
|
| |
|
Tourer
Posts: 395
Moravia, IA | victoryvisiontour - 2011-12-31 2:42 PM
I went cheap with a switch I found in the automotive section of the grocery store.
Your likely going to have trouble with that switch.....
I have blue LEDs all over my bike. I used the 4th hole like you.....used a similar switch.
First time I rode in a hard rain moisture got into the switch. End result was the water caused enough current flow the lights were on regardless of the position of the switch. Not full intensity....but probably 1/2 or so.
I tried a switch from the nearby marine supply - same result.
After "trying" 3 different switches I bit the bullet, ponyed up the dough and ordered one of the factory Victory switches. Ive never had a problem since.
I believe I ordered another hazard switch. I made a sticker to go over it to indicate it was for the LEDs.
|
|
| |
|
Iron Butt
Posts: 763
Anderson, IN (48mi NE of downtown Indianapolis) | aaronrkelly,
I realize I could have trouble with the switch. The switch itself is an experiment to see if it will last. If I have problems I can replace it without having to remove the console. It would literally be a 15 second swap job. Everything else on the setup is done right with quality parts.
My motto, "you never know if it will work until you try it". Since the switch was only $3.19 I figured this would be an inexpensive test. Had I known the issue you had with cheap switches I would have used a quality one.
Thanks for the warning and I will post here if I have problems with the switch.
Edited by victoryvisiontour 2012-01-04 9:53 AM
|
|
| |
|
Tourer
Posts: 395
Moravia, IA | If you don't get into alot of rain your fine....I rode in regular rain several times with no issue. It was a hard rain that hosed the switches up and really only after the bike set stationary, I'm assuming letting the water really seep into the switch. I woke up in a campground once cause my bike was lit up like a Christmas tree...lol. |
|
| |
|
Cruiser
Posts: 112
Denver, Iowa | That's funny! lol! I needed that!
|
|
| |
|
Cruiser
Posts: 70
Indianapolis, IN United States | I know this is an old thread so sorry for that. I just did this mod with a factory switch so I didn't use a diode. Switch works fine as intended but turning key on whether the switch is on or not pops the horn fuse every time. As soon as I disconnect from the seat plug my horn fuse is happy. Is this because I don't have the diode? |
|
| |
|
Cruiser
Posts: 251
Mechanicsville, VA United States | Sounds like it! |
|
| |
|
Visionary
Posts: 4278
| jdr00ejr - 2015-04-21 10:07 PM I know this is an old thread so sorry for that. I just did this mod with a factory switch so I didn't use a diode. Switch works fine as intended but turning key on whether the switch is on or not pops the horn fuse every time. As soon as I disconnect from the seat plug my horn fuse is happy. Is this because I don't have the diode? What are you talking about? Side bages come on with the ingnition switch. |
|
| |
|
Cruiser
Posts: 70
Indianapolis, IN United States | johnnyvision - 2015-04-22 6:40 PM
jdr00ejr - 2015-04-21 10:07 PM I know this is an old thread so sorry for that. I just did this mod with a factory switch so I didn't use a diode. Switch works fine as intended but turning key on whether the switch is on or not pops the horn fuse every time. As soon as I disconnect from the seat plug my horn fuse is happy. Is this because I don't have the diode? ? What are you talking about? Side bages come on with the ingnition switch.
Let me try and explain a different way.
Ran a fused (10amp) line direct from the battery to a "Victory Dash Switch" (not a lighted switch like you used - ordered this one as a true victory switch). Ran a line from the switch to the grey wire on the plug (no diode - straight line). Ran a ground line to the switch.
When I flip my newly wired switch, badge lights come on - I'm so excited.
When I put the key in the ignition and turn the key on (newly wired switch off) - badges do not light. Horn does not work. Power outlet dead. Horn fuse blown. Removed Key. Replaced Fuse. Checked newly wired switch - badges light up. Turned off newly wired switch - put key in - turn key on - horn fuse blown again. Remove Grey wire connection (newly wire switch now does nothing). Replaced fuse - badges light only when key turned on - back to factory with a worthless switch now installed on my dash.
So I didn't install the diode because in your instructions you talked about a lighted switch and the diode was needed to keep the switch from being lit all the time. Well with no lighted switch, I didn't feel the diode was necessary - but now am wondering if that's why I'm blowing my horn fuse. |
|
| |
|
Visionary
Posts: 4278
| so you add light to your chess wedges. Your not talking about the victory logo badges?
The grey plug has power and ground. If you ran it to the power side you blue a fuse.
It you tuck power from battery to switch to your new lights you would not need that gray plug.
Unhook your power and test gray plug with a meter for power and ground with key on
|
|
| |
|
Puddle Jumper
Posts: 11
Trenton, Ohio | This is a pretty easy modification. What I did was ran a dedicated fused line that goes to a remote transceiver for my blue led lights I put around the engine. Before the remote transceiver I tapped into the line then ran to a toggle switch that fit in the fourth spot on the dash. Got the toggle switch from Parts Express. It was a little too tight so I used a fine file to open up the hole in the dash. Before you tie into the line for the lighted badges, I installed a diode. One last thing, I wondered how long I could run the led lights and the victory badges so I left them on all night long and had no issues. Also, one other thing I did was I installed a round toggle switch inside one of my saddle bags and put white led strips inside of saddle bags. Really helps out at night time when I get into the saddle bags. |
|
| |
|
Cruiser
Posts: 70
Indianapolis, IN United States | JohnnyVision - I am talking about the factory installed logo lights on the side of the bike. Fused line from Battery to switch I installed in the console (not a lighted switch). I didn't want to do the add-a-fuse route - which is why I went straight from the battery with a fused line instead. Ran a separate line to the grey plug grey wire as you stated in your directions. Grounded the third terminal on the switch. with no Diode I keep blowing a fuse. Wired me in a diode yesterday and all is well. No worries. Sorry for all the confusion. |
|
| |
|
Visionary
Posts: 4278
| there is a wire on each side for the badges. you don't need to run a special wire for them. If your blowing a fuse then I'm guessing you have power wired to ground. The factory gray plugs has one power and one black wire to a gray plastic plug. There is a BLACK dot on the power side of the plug.
You have to pull the dash panel to find the OEM wire |
|
| |
 Turn lighted badges on with a rocker switch - need advice.
 Turn lighted badges on with a rocker switch - need advice.